Vineco Wine Kits Instructions
VINECO WINE KITS INSTRUCTIONS :4 - 8 WEEK WINE KITS
The number of weeks required to make your wine is indicated on the front of your kit box.
Vineco Wine Kits

VineCo Estate Series Riesling California Wine Making Kit - 30 Bottles


VineCo Estate Series Sauvignon Blanc, California Wine Making Kit - 30 Bottles
VineCo Estate Series Pinot Grigio Italy Wine Brewing Kit - 30 Bottles
Vineco Estate Series Chardonnay Australia Wine Making Kit - 30 Bottles
VineCo Estate Series Cabernet Sauvignon, Australia Wine Making Kit - 30 Bottles
VineCo Estate Series - Amarone Italy Wine Making Kit - 30 Bottles
VineCo Original Series Cabernet Sauvignon Chile Wine Brewing Kit - 30 Btl
VineCo Original Series Shiraz, California Wine Brewing Kit - 30 Btl
VineCo Original Series Trilogy California Wine Brewing Kit - 30 Btl
VineCo Original Series Chardonnay California Homebrew Wine Kit - 30 Btl
STEP 1 DAY 1 - PRIMARY FERMENTATION DAY 1
BE SURE TO USE ALL INGREDIENT PACKAGES INCLUDED IN YOUR KIT.
Your wine kit includes the following:
-
Wine Base – unlabeled large bag consisting of grape juice concentrate
-
Reserve (if included) – smaller bag
-
May contain Oak (granular, chips or cubes).
-
Yeast Pack (up to 2 packages)
-
Bentonite – helps yeast activity and removes proteins
-
Potassium Metabisulphite/Potassium Sorbate packet – used to prevent oxidization and inhibit yeast growth.
-
Fining Agents – Kieselsol and Chitosan – Removes suspended particles, which results in a clear, stable wine.
WINEMAKING EQUIPMENT NEEDED
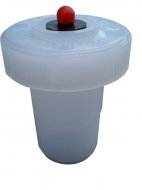
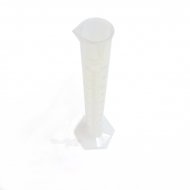
Primary Fermenter:A food grade graduated plastic container and lid up to 25 L/6 US gal.
Carboy:
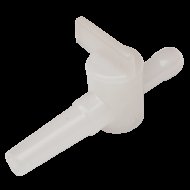
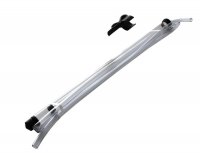
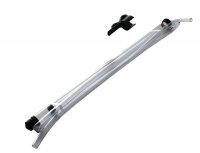
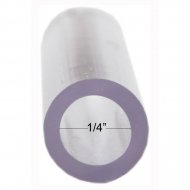
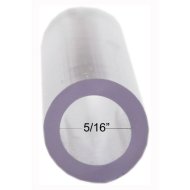
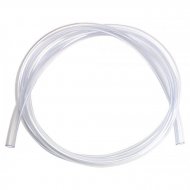
A glass or plastic carboy to hold 23 L /6 US gal. and will fit a fermentation lock and stopper.Racking Tube & Tubing:
Approximately 6 ft. long flexible food grade tubing with a rigid plastic siphon rod and anti-sediment tip.Fermentation AirLock & Stopper:
Fits into the carboy, and is half-filled with sulphite solution. Allows CO2 to escape and prevents oxygen and spoilage organisms from entering the wine.Mixing Spoon:
Food grade plastic stirring utensil 70 cm (28”) in length.Solid Bung:
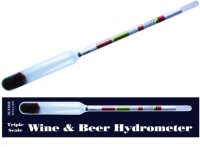
Fits into carboy. Prevents oxygen and spoilage organisms from entering the wine. Use once wine is fully degassed.Hydrometer:
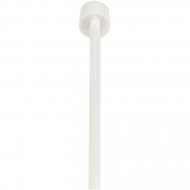
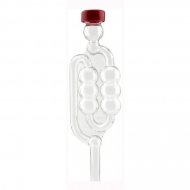
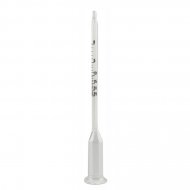
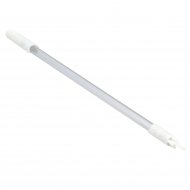
Used to check specific gravity of your wine at different stages of the fermentation process.Wine Thief:
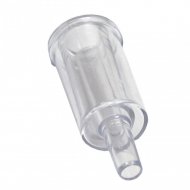
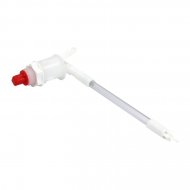
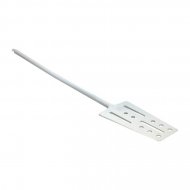
Used to take out samples from the primary and carboy.Bottle Filler:
Automatically dispenses liquid when inserted into a bottle and stops liquid flow upon removal.Wine Bottles:
28-30 x 750 mL/26 oz bottles and corks.Wine Making Equipment Needed


GENERAL INFORMATION:


-
Clean and sanitize ALL equipment (bottles, hoses, primary fermenter, carboy, stirring spoon, etc.). Cleaning and sanitizing is a two-step process:
-
a) Cleaning: A winemaking cleaner is required (not included).
Rinse equipment thoroughly after cleaning.
-
b) Sanitizing: Use a metabisulphite solution (not included).
Rinse thoroughly after sanitizing. Note: The Potassium Metabisulphite packet included in your kit is NOT for this use. For instructions to make a sulphite solution visit: www.winemakerschool.com
-
-
When taking Day 1 specific gravity (S.G.) reading with a hydrometer, ensure that primary fermenter contents are well stirred. Take the S.G. reading immediately after stirring. Juice and water naturally want to separate and the juice base will sink to the bottom. This will not affect the fermentation but will skew the Day 1 reading. For hydrometer tips, visit: www.winemakerschool.com
-
To ensure your wine is degassed:
-
a) Taste your wine. Remove a small sample from the carboy
after degassing. If the wine is spritzy on the tongue, repeat the degassing step. At this stage it will not taste as it will at bottling.
-
b) Fill a test jar halfway with degassed wine and give it a good shake with your hand covering the opening. If there is a big pop, then repeat the degassing step. If the popping sound is small then the wine is sufficiently degassed.
Global Vintners Inc.
27 Scott Street West
St. Catharines, ON L2R 1E1info@globalvintners.ca
-
IMPORTANT: Ensure that your primary fermenter is large enough for the juice bladder with space for foaming during fermentation.
The number of weeks required to make your wine is indicated on the front of your kit box.
|
SPECIFIC GRAVITY (S.G.) BY STAGE |
||
|
WINE KIT |
DAY 1 S.G. |
DAY 14 S.G. |
|
4 week |
1.070 - 1.097 |
< 0.996 |
|
6 week |
1.080 - 1.100 |
< 0.996 |
|
8 week |
1.080 - 1.100 |
< 0.996 |
STEP 1 DAY 1 - PRIMARY FERMENTATION
-
1.1 Clean and sanitize equipment to be used. Bring all kit components up to room temperature.
-
1.2 Pour 2 L (8 cups) of hot tap water into bottom of the primary fermenter and stir in Bentonite. Mix well. It is normal for Bentonite to not fully dissolve in water.
-
1.3 Pour contents of the juice base bag into the primary fermenter. Rinse bag with water and add to primary fermenter. If there are two bags, use the larger one now. The reserve (small bag) is not added at this step.
-
1.4 Top primary fermenter up to 23 L (6 gallon) mark with good quality, cool drinking water.
-
1.5 If your kit contains Oak Chips or Granular Oak, stir in now. If your kit contains oak cubes, they will be added at a later stage.
-
1.6 Stir well. Use a hydrometer to measure and record the Day 1 Specific Gravity (S.G.) in the chart provided in these
-
1.7 Sprinkle Dry Yeast on top of juice base (if your kit contains two packages of yeast, add both now).
-
1.8 Place loose fitting lid, or primary lid with airlock filled halfway with sulphite solution on primary fermenter. The included sulphite/sorbate packet is not used for this purpose. (Visit www.winemakerschool.com for making a sulphite solution).
-
1.9 Keep fermentation area warm (20°C to 25°C or 68°F to 77°F) for the entire winemaking process.
STEP 2 DAY 14 - STABILIZING/DEGASSING
2.1 Check chart for required S.G. reading. Measure the S.G. If wine is not in range, check again in 48 hours. If in range, record the number.
Date: MM/DD/YY S.G.:
-
2.2 Using sanitized equipment carefully syphon (rack) wine into a clean/sanitized carboy leaving sediment behind.
-
2.3 Add contents of Potassium Metabisulphite/Potassium Sorbate package directly into the carboy of wine.
-
2.4 Agitate wine using a sterilized stirring spoon. Vigorously stir wine, changing direction intermittently for 10 minutes. Alternately, wine can be degassed using a drill with degassing attachment for 2-4 minutes at medium speed reversing direction every 30 seconds. See General Information for more detail on degassing.
-
2.5 Stir in Kieselsol. If your kit contains two, add one package now. The other will be added at a later stage.
-
2.6 Fit airlock filled halfway with sulphite solution into the neck of the carboy and leave for 24 hours.
STEP 3 DAY 15 - CLEARING
-
3.1 Stir the contents of the Reserve(s) into the carboy, if included
-
3.2 Stir in Chitosan(s).
-
3.3 If your kit contains a second Kieselsol, stir in one hour after Chitosan addition.
-
3.4 If your kit contains Oak Cubes, stir them in now.
-
3.5 Replace airlock and leave wine to sit in a warm (20°C to 25°C or 68°F to 77°F), undisturbed area away from direct heat and light.
-
3.6 After 5 days, give the carboy a twist (without lifting) to allow any sediment stuck to the walls of the carboy to drop.
-
3.7 Continue clearing process according to the chart below. Topping up the carboy during the clearing process is not required. If choosing to top-up use a similar style of wine. Water is not recommended.
|
CLEARING TIMETABLE |
||
|
WINE KIT |
POLISHING RACK DAY |
BOTTLING DAY |
|
4 week |
26 |
28 |
|
6 week |
40 |
42 |
|
8 week |
54 |
56 |
STEP 4 DAY 26-54 - POLISHING RACK/AGING
-
4.1 Wine should be perfectly clear. If not, leave wine another 7-14 days to finish clearing.
-
4.2 Carefully rack wine off of sediment (and oak cubes if present) into a clean and sanitized carboy fitted with a solid bung.
-
4.3 Leave wine to sit undisturbed a minimum of 2 days to allow settling.
Optional Steps:
a) If aging your wine longer than 3 months, add 1.5g (1/4 tsp) of potassium metabisulphite to the wine at this time to help preserve flavour and colour.
b) If filtering wine, do so at this stage. NEVER FILTER CLOUDY WINE.
STEP 5 BOTTLING (CLEAR WINE ONLY)
-
5.1 Carefully syphon your wine into clean and sanitized bottles.
-
5.2 Cork bottles and leave upright for 3-5 days allowing cork to expand. Invert or store on side to keep cork moist.
Store wine at 11°C to 18°C or 52°F to 65°F. If choosing to carboy age wine, top-up with a similar style wine and fit with a solid stopper. Bottle aging is the preferred method.