How to Cork A Wine Bottle - Wine Bottle Corking
You’ve made it - you’ve finished making the wine, pouring a whole lot of effort, skill and love into the drink. The aroma is perfect, the flavour is just right, and now you’re faced with an important final step:closing your wine bottles.
Do it right, and your wine will age beautifully, preserving its taste and aroma.
Do it wrong, and you may risk oxidation, leakage, or contamination.
While modern screw caps have gained popularity for their simplicity, there are many drinkers and winemakers today who simply prefer the traditional corks, settling the great wine debate.
In fact, corking provides the best long-term protection for your wine and most high-end bottles that go through years of aging use corks.
But, without the right knowledge, the process can feel intimidating, especially for beginners. Improper technique or the wrong tools could lead to leaks or contamination, undoing all your efforts. Luckily, our simple guide on how to cork a wine bottle can help you master this art and preserve the quality of your drink.
Wine Bottle Corking Equipment


What Is Corking and Why It's Important?
Corking is the process of sealing a wine bottle with a cork to prevent air from getting in and ruining the wine. Before corks, wine bottles were closed by using pieces of cloth or leather followed by the application of clay or sealing wax. Since the 1600s, corking has become the method of choice for different reasons.
It doesn’t matter if the wine in question is still, sparkling or fortified, corking plays a crucial part in ensuring the freshness of the drink. It helps preserve its taste and extends its shelf life. Being waterproof and permeable to air, cork offers the perfect conditions for slow and continuous air oxygenation required for wine aging.
Essential Things to Know Before Corking
Before we move on to the instructions on how to cork a bottle of wine, it’s essential to pay attention to the following factors:
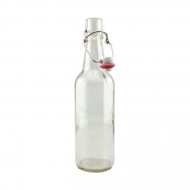
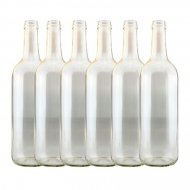
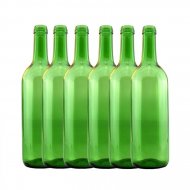
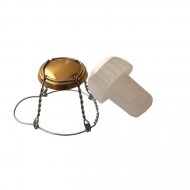
- Choosing The Right Wine Bottle: Not all bottles are suitable for corking. Instead of ruining your fine wine, research the different options of wine bottles. Besides picking the suitable size and glass colour, also make sure that the bottles' closure type is listed as "cork". Bottles with cork closure are different from screw tops and champagne bottles as they have a standard 3/4 inch opening.
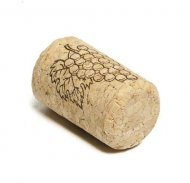
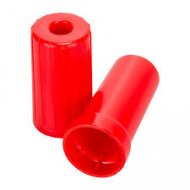
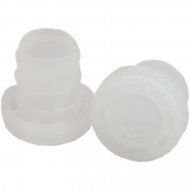
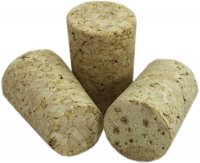
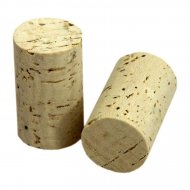
- Choosing The Right Cork: To master the technique of how to cork a wine bottle, choose properly from a range of wine corks which can be natural or synthetic. Natural cork is derived from oak trees and is fit for wine aging. It can be treated with silicone for ease of use. Synthetic cork is made from plastic compounds, eliminating the risk of taint, though it can be more
challenging to apply. Style is another distinction, with straight and tapered corks, out of which straight makes for a better seal. Lastly, consider cork sizes (diameter and length) to ensure proper fit for the corker and opening and neck of the bottle. - Choosing The Right Corking Tool: Corking wine by hand can be done with simple handheld corkers, single or double corkers, or a floor corker with a compression mechanism for minimal effort. Your choice comes down to preference, batch, and budget.
Preparation: What to Do Before Corking?
Besides having the basics like bottles, corks and tools, prior to starting corking, you also need to take care of:
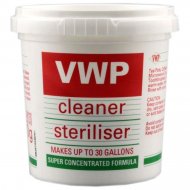
- Bottle Inspection and Cleaning: If you haven’t done so as soon as you got them, check the bottles for signs of damage like chips or cracks. Once you’ve determined they're in top condition, clean them well with warm water, suitable brushes and sanitiser. This eliminates the risk ofcontamination.
- Cork Softening: For seamless application, clean and soften the corks with specialised solutions like sodium metabisulphite. Measure 1/4 of the solution in 1/2 pint of water in a jug, pour in a pot and bring to a boil, then add the corks in with the lid on to steam for a minute.
- Proper Bottle Filling: To get the perfect seal, you need to get the wine bottling right. To prevent leaks, it’s always best to leave a bit of headspace at the top, about half an inch.
- Tool Usage: Make sure to use a corker that's suitable for the size of your bottles and corks. Additionally, check the instructions that come with the corker. If needed, practise beforehand to get an idea of how much strength you have to apply.
How to Cork Wine Bottles?
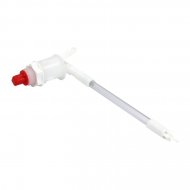
For corking wine bottles by hand, you can soften corks in the microwave for about 20 seconds and insert each manually in the bottles. For a bit of help, use a handheld bottle corker instead.
It consists of two parts: a lower one where you insert the cork and then add it on top of the bottle opening, and a top part which secures the cork when applying pressure. Once the cork is set in place, you should hear a sound. More laborious, it’s best suited for small batches.
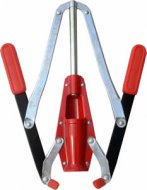
The single-lever and double-lever corkers are upgrades to the handheld and as such are slightly costlier.
They’re easier to use and don’t require much strength due to the presence of a lever. The concept of both is the same: you add the cork in the designated opening, squeeze the handles to compress it and make it fit in the bottle, place it on top of the bottle and then press.
For more extensive production in wineries where speed and efficiency are key, high-end pneumatic and electric corkers streamline the process.
What to Do After Corking?
For the cork to set properly, leave the bottle upright for at least a day before storing it. When storing, place the bottle horizontally instead of upright to give the cork the needed moisture from the wine and prevent it from drying.
Additional Tips for Successful Corking
There are a few other things to keep in mind:
- Don’t use damaged or low-quality corks.
- Don’t place the bottle on a table or countertop when working with the corker.
- Instead, place it on the floor for maximum strength and stability.
- Store bottles in a cool and dark place.
Conclusion
Imagine opening a bottle years later and enjoying the perfect pour of your aged wine, all because you took the time to cork it correctly. Well, now that you know how to put a cork in a bottle, your winemaking journey is one step closer to professional-quality results.
Did you find our guide helpful? Be sure to let us know.