


Bottling Wine, Beer & Cider.
WHEN TO BOTTLE WINE
 Bottling your wine, beer or cider is the final stage of brewing before you can drink it.
It is worth completing this process with as much care and attention as you have lavished on the earlier stages, ensuring your sanitation levels are still high, as it would be a great shame to spoil your efforts at this late stage. When it comes to storing your brew, bottling is the leading choice and is relatively simple. The bottled beer looks attractive and has the advantage of being easy to store and transport.
TYPES OF BOTTLES TO USE WHEN BOTTLING BEER, WINE OR CIDER
When selecting bottles, you have a few options.
1. Bottles from the supermarket contained carbonated drinks ( bottles which, when first opened, you can hear the gas escaping).
2. Reusing commercial beer, wine or cider bottles
3. Purchase new bottles from your local home brew store.
The most important thing to remember when choosing your bottles is
1. Bottles must be designed to take the pressure of carbonated drinks. If not, they could explode, leaving your beer, wine or cider all over the floor.
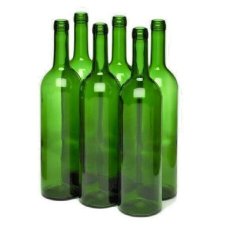
2. Beer and wine keep better in brown bottles as sunlight penetrates clear bottles easier and can harm your brew.
REUSE OF BOTTLES FROM THE SUPERMARKET
The cheapest option is reusing bottles from the supermarket containing a fizzy drink.
They come in various sizes, are specially designed for carbonated beverages, and you can soak them to remove the labels.
Unfortunately, they are often clear, which leaves your beer at risk of exposure to sunlight. The sunlight reacts with hop compounds in the beer and can cause 'skunking'.
REUSING COMMERCIAL BEER BOTTLES
Reusing commercial beer bottles is a good option if you have saved enough.
It's simply a case of cleaning, removing the labels, sanitising and recapping them.
As we mentioned earlier, we recommend using brown glass over clear glass. The brown glass will help preserve your beer's shelf life. Ensure you thoroughly check any bottles for chips, scratches or imperfections and do not use them if they are damaged.
One thing to consider is that your bottles will have a variety of shapes and sizes, which may not appeal to you.
PURCHASE NEW BOTTLES FROM YOUR LOCAL HOME BREW STORE
Brew Mart stocks a good selection of bottles of different sizes that you can buy in either glass or plastic and clear, brown or green.
Your choices are:
1. Flip-top Grolsch-style bottles are straightforward to use as they are reusable and do not require any equipment or purchase of any caps.
2. Traditional beer bottles. These require a cap. You will need a bottle capper and caps. You can purchase the caps in different colours, which gives you the option of using a different colour cap for different beers,
3. PET bottles. Plastic beer bottles are lightweight and very reasonably priced. PET bottles do not last as long as glass bottles but are not prone to breakages and come with a screw cap.
 PROBLEM FREE BOTTLING
Before you begin bottling, decide how you wish to do a secondary fermentation.
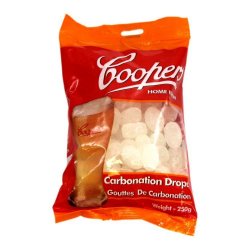
1. Do you wish to use carbonation drops?
2. Do you want to use a priming solution?
Both have their merits. Priming solution, as the name suggests, is making a solution which can be mixed with the whole batch of beer before bottling and carbonation drops are added to each bottle after bottling.
Click here to read more about secondary fermentation.
BE SURE ANY FERMENTATION IS COMPLETELY FINISHED BEFORE BOTTLING
Before you come to the bottling stage,
1. Use your hydrometer to check that fermentation is complete.
2. Ensure you get a stable reading for a least two days.
3. an excellent stable reading is 1.010
(e.g. 1.010 for two days).
4. If you take a reading that has changed from the previous day, your beer is still fermenting and should not be bottled.
5. Making sure the beer is fully fermented is extremely important, as bottling beer still fermenting can lead to bottle explosions.
6. Occassionaly, the yeast can 'wake up and eat more sugar than expected.
Now that your beer has finished primary fermentation and you are ready to bottle, everything you use needs to be clean and sanitised. If you have a spare large fermentation bucket, fill it up with your sanitising solution and put in everything you'll use to bottle the beer. include
- syphon tubing,
- canes,
- bottling wands
- Bottles
- Caps
- Bottling bucket
- Bottle capper
Now that everything is clean and sanitised, you can start bottling. Bottling can leave your beer exposed to bacteria and infection. It is essential to avoid introducing oxygen into your beer as much as possible, as this will reduce your beer's shelf life.
WHAT TO ELIMINATE WHEN BOTTLING BEER
Unfortunately, oxygen is not a welcome friend to beer.
It will shorten the shelf life of beer
Oxygen will introduce stale unwanted flavours.
The task of bottling opens many opportunities for air to be introduced to beer.
The safest way to avoid these dangers is to use a bottling wand like the little bottler. The little bottler fills the bottles from the bottom up, avoiding splashing and contact with the atmosphere.
Alternatively, if you syphon, keep the ends of the hose submerged, so there is no splashing, and cap those bottles as soon as convenient to keep the oxygen out.
FILLING BOTTLES WITH A SYPHON
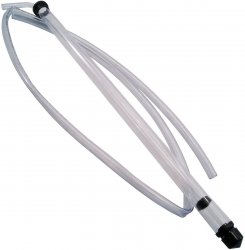 Filling bottles with a syphon is very similar to racking off. It would help if you raised the bucket above the bottles to allow symphonic action to work. Then, as with racking off, draw the liquid through the syphon using suction or pump action if you have a pump action syphon. Once the beer or wine is flowing, fill the bottles. You will need to either turn the syphon tap off or pinch the syphon tube to stop the flow when moving the syphon between bottles. When syphoning, you are restricted to filling one bottle at a time. People have experimented with different ways of filling multiple bottles with a syphon or two, but none have proved practical.
FILLING BOTTLES WITH A DEVICE (LITTLE BOTTLER)
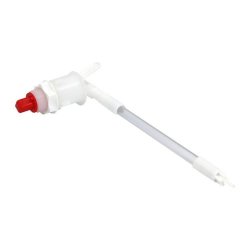 A little bottler is a tap with a sediment shield. Position the tap toward the bottom of the bucket. Low enough to get all the beer out, high enough to avoid unwanted sediment, and prevent the tap from protruding near the bucket's base. In practical terms, this means the body of the tap needs to be about 25-30mm from the bottom of the bucket.
The tap comes with a bottling device and a rigid tube with an automatic shut-off device fixed at the bottom.
The tube has four thin prongs at the bottom, which maintain a gap between the bottom of the bottle. The prongs allow the liquid to flow when the shut-off device's seal is broken.
A fifth prong is attached to the shut-off device, which will facilitate breaking the seal when a bottle is pushed up onto the bottling device.
When a bottle is lifted to the bottler, the bottom of the bottle needs to push up on the pin of the shut-off device.
Doing this will make the device clear of the base of the tube and break the seal created by the auto shut-off device.
The liquid will flow into the bottle, and when it is full, take it away, and the device will automatically re-seal itself.
Repeat this process until all the bottles are full or the bucket is empty. People have used two bottling devices on one bucket with notable success. We do not recommend using a bottling device and a syphon together. We tried it purely for research, and it did not work well.
Finally, remember there is nothing as enjoyable as cracking open a bottle of your beer after a long day at work or the beach or giving them away to friends and family, so keep this in mind during the bottling process. And there you have it! A quick guide on how to bottle beer.
If you have any questions or suggestions, don't hesitate to get in touch with us by;
e-mail: info@brewmart.co.uk
Phone: (0114) 2746850
Facebook: Brewmart Sheffield
Twitter: @Brew_Mart_Sheff
Check out all Brew Mart's home brew hints & tips