


The Difference Between Disinfection And Sterilisation
In brewing, creating a happy and healthy environment for the yeast is crucial. Any germs, bacteria and such will have adverse effects on your brew, and you must remove the germs from anything that will come in contact with the wort/beer/wine/spirits at any time.
1. DISINFECTION AND STERILISATION AND OF BREW EQUIPMENT
2. DISINFECTION / SANITISING HOME BREW EQUIPMENT
3. THE DIFFERENCE BETWEEN STERILISATION AND DISINFECTION OF HOME BREW EQUIPMENT
4. DISINFECTION AND STERILISATION SUMMARY LIST
|
Sterilisation methods There are three main cleaning terms in brewing: Disinfection and sterilization methods are both decontamination processes, and sterilising kills all microorganisms. 1. CLEANING is the means of reducing or eliminating microorganisms which are harmful to objects and surfaces. By cleaning, we refer to soil, dirt and visible stains that need removing. This level of cleaning is the same method any householder does, such as washing the dishes. Every piece of equipment you use during a brew should be clean and free of dust or grease. When cleaning plastic items, avoid using anything that may scratch the surface, such as hard scouring pads, as those little scratches are an ideal place for microbes to hide. 2. SANITISING / DISINFECTION is the next step which means you're getting rid of what you can't see to minimise the chances of spoiling your brewing efforts—sanitising reduces any potential sources of microbial spoilage to irrelevant levels. At the homebrew level, sanitising isn't very difficult and is an integral part of brewing which is easy to master. Be sure to clean your equipment after each use, and you can be confident that the sanitising will be effective before any subsequent use. 3. STERILISATION kills all microorganisms. Sterilising eliminates all life forms on any object. Since sanitising your brewing equipment is the optimum method, a home brewer need not worry about sterilisation. Anyone who works in a brewery can tell you that the main mantra is cleaning. Thankfully, when it comes to homebrew, things are somewhat less demanding. However, the principle is the same – if you skimp on cleaning, you will probably be disappointed with spoiled goods down the line. Whatever you're making, the underlying principle in brewing alcohol is:
That same sugary liquid will also be very inviting to many microbes. Pediococcus is an example. It produces undesirable flavours and can cause your brew to turn' ropey.' No brewer wants slimy strands of goo in their brew. Mastering the basic principles of good hygiene will be very helpful.
|
1. CLEANING HOME BREW EQUIPMENT
| WASHING UP LIQUID
Suitable for: entry-level cleaning – but not sanitising Cleaning refers to visible stains, soil and dirt. This soil is the same level as washing crockery and cutlery. When cleaning your equipment, the same detergent you use for washing crockery or pots and pans is perfect for brewing equipment. Some of the following sanitisers are better, but if you're starting your adventure into brewing beer, they aren't essential. Be aware that any scented washing-up liquid must be thoroughly rinsed off. Washing-up liquid will not sanitise your equipment. Everything you use during a brew day should be clean and free of dust or grease. When cleaning plastic items, bear in mind that plastic items can easily be scratched, so avoid using hard scouring pads as those little scratches are an ideal place for microbes to hide. |
|
BLEACH - NOT SUITABLE FOR MOST HOMEBREW PRODUCTS. Suitable: for heavy-duty cleaning and sanitising, especially on the glass. Bleach requires extra care and attention. Bleach should not be used neat from the bottle. If bleach is diluted to the correct measurement, it is highly effective as a cleaner and a sanitiser, but it will react badly to some substances. Copper or brass can turn black, and plastics are subject to clouding, Be careful of what and how you use it. Even stainless steel can pit if left in bleach too long. Do not soak anything except glass in it for more than thirty minutes. You have to be aware that the flavour and aroma of bleach are detectable even in minuscule amounts, which means that even at safe levels of dilution, bleach can taint the taste of your beer. For this reason, anything you sanitise with a bleach solution must be thoroughly rinsed, ideally with boiling water. When you use bleach, look to get an unthickened and unscented type. To a ratio of 1 litre of water, add 2ml of domestic bleach. This dilution will give you a solution that will take dirt off effectively when scrubbed within a few minutes of soaking. Percarbonate cleaners benefit from cleaning and bleaching without the problem of smell and clouding. |

Glass Cleaning
Glass has the genuine advantage of being inert to everything you might use to clean it. The primary considerations are the danger of breakage and the potential for stubborn lime deposits caused by using bleach and TSP in hard water areas.
When cleaning your glass bottles and carboys, you will probably want to use bottle and carboy brushes to clean the insides effectively.
Cleaning Plastic
There are three kinds of plastic that you will be cleaning:
- Opaque white polypropylene. Polypropylene is used for fermenting buckets and fittings plus utensils.
- Hard clear polycarbonate. Polycarbonate is used for spoons and stirrers, and measuring cups.
- Clear soft vinyl tubing. Vinyl tubing of different diameters is used for syphons.
- You will often hear polypropylene referred to as "food grade plastic", though all three plastics are food grade.
The main thing to remember when cleaning plastics is that they may adsorb odours and stains from the cleaning products you use.
Washing up liquid is your best bet for general cleaning, but you should avoid scented detergents.
Dishwashers are a very convenient way to clean plastic items. You must ensure that the water can reach inside any vessel.
Care is needed as the heat might warp plastic equipment.
Stainless Steel and Aluminium Cleaning
For general cleaning, any mild unscented washing-up liquid is best for steel and aluminium. It would be best if you avoided bleach because a bleach solution's high pH can cause aluminium corrosion and, to a lesser degree, stainless steel.
Do not clean aluminium shiny bright or use bleach to clean an aluminium utensil as this removes the protective oxides and may result in a metallic taste.
This detectable level of aluminium is not hazardous. There is more aluminium in a typical antacid tablet than would be present in a batch of beer made in an aluminium pot.
|
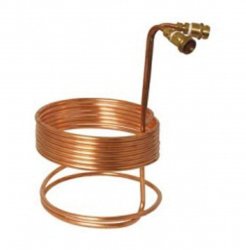
CLEANING COPPER Percarbonate-based cleaners like PBW are an excellent choice for routine cleaning copper and other metals. Acetic acid is very effective for heavily oxidised conditions. Brewers who use immersion wort chillers can be surprised by how bright and shiny the chiller is when it comes out of the wort. If the wort chiller wasn't as bright and shiny when it went into the wort, You have to ask yourself, where has the grime and oxides ended up? You've guessed it, in your beer. Any copper oxides left on the wort chiller are dissolved by the mildly acidic wort, leaving the wort chiller looking shiny. Cleaning copper tubing with acetic acid before the first use and subsequently rinsing with water immediately after each further use, the copper will remain clean with no oxide or wort deposits that could harbour bacteria. Copper cleaning with vinegar should only occasionally be necessary. Use only white distilled vinegar and not cider or wine vinegar. Distilled vinegar is essential because these other types may contain live acetobacter cultures. These cultures are not wanted in your brew. Star San is the best sanitiser for counterflow wort chillers. Star San is acidic and can be used to clean copper and sanitise simultaneously. It is alright to leave Star San in the chiller overnight to soak-clean the inside. Do not clean and sanitise copper with any bleach solutions. The hypochlorites and chlorine in bleach cause oxidation and blackening of copper and brass. If the oxides come into contact with the acidic wort, it causes them too quickly dissolve, which may expose the yeast to unhealthy levels of copper during fermentation. |
Brass Cleaning
Some wort chillers have brass fittings, like other brewing equipment, and brewers are concerned about the lead-in brass alloys.
This concern is alleviated by using a solution of two parts white vinegar to one part hydrogen peroxide (standard 3% solution) to remove the tarnish and surface lead from brass parts. You can soak these parts for fifteen minutes at room temperature.
The brass will turn a bright yellow colour as it is cleaned. If the solution turns green, the brass has been soaking too long, and the brass's copper is beginning to dissolve. The solution has become contaminated, and the equipment should be re-cleaned in a new solution.
Proprietary Mixes Suitable for: Cleaning, disinfection and sterilisation
 |
 |
VWP and PBW are the best-known cleaners and sanitisers in the homebrew world.
Both clean dirt off excellently but also have a sanitising function, rinse off quickly and leave no odour. These cleaners are reliable, reasonably priced, store well, and work on a whole range of equipment.
2. SANITISING HOME BREW EQUIPMENT
Once your equipment is thoroughly clean, you only need to sanitise it before use. Only the items that will contact the wort after the boil must be sanitised:
airlock and rubber stopper,
yeast starter jar,
Your bottles need sanitisation, but that can wait until bottling day.
Chemical and heat are two very convenient ways to sanitise your equipment.
When using chemical sanitisers, you can prepare the solution in the fermentor bucket and soak all the additional equipment there.
Heat sanitising methods depend on the type of material being sanitised.
|
NO-RINSE SANITISERS Chemsan and Star-San are the two most notable brands. Suitable for: best quality sanitisation immediately before and during a brew. NOTE THEY ARE NOT CLEANERS AND SHOULD NOT BE USED AS SUCH It is good practice to sanitise your equipment as close to being used as possible, and the solution is to use a 'no-rinse' solution. Have a few litres of one of these solutions, and you can keep any stirrers or lengths of hose in it ready for use. You can use the same solution to rinse your clean fermenting bucket before use. Note that these 'no-rinse' will only sanitise and have no cleaning power. Don't try and use them for any other purpose. When getting bottles ready for filling day, follow precisely the same principles. If you're keeping beer bottles for reuse, a quick rinse-out of any sediment immediately after drinking makes the bottles much easier to clean when the time comes to clean them properly. A bottle brush is beneficial for getting at anything lurking inside when cleaning them thoroughly. Putting clean bottles through a dishwasher cycle without detergent or rinse aid will sanitise them once they're clean. |
Chemicals for sanitising home brew equipment
1. Bleach
- The cheapest and most readily available sanitising solution is made by adding one tablespoon of bleach to 1 gallon of water.
- Let the equipment soak for 20 minutes, and then drain.
- Rinsing is supposedly unnecessary at this concentration, but many brewers, rinse with some boiled water to ensure no off-flavours from the chlorine.
3. Iodophor - IO Star 
- IO Star- iIodophor is an iodine-containing solution with a polymer carrier that is very easy to use.
- 1 tablespoon in 5 gallons of water (15ml in19 l) is needed to sanitise equipment with a two-minute soak time.
- This ratio produces a concentration of 12.5 ppm of titratable iodine.
- Soaking equipment in the same concentration for more than ten minutes at a time will disinfect surfaces and equipment to hospital standards.
- At a ratio of 12.5 ppm, the solution has a slight brown colour that you can use to monitor the solution's viability.
- If the solution loses its colour, it has lost enough free iodine to carry on working.
- No advantage is achieved by using more than the specified amount of iodophor. By doing so, you are wasting the product and risk exposing yourself and your brew to large amounts of iodine.
- Iodophor can stain plastic after long exposures, but that is nothing to worry about as it is only a cosmetic problem.
- Using the 12.5 ppm concentration does not need to be rinsed, but the equipment should be allowed to drain before use.
- However, even though the recommended concentration is well below the taste threshold, it is good practice to rinse everything with a little bit of cooled boiled water to avoid any chance of off-flavours.
2. Star San
- Star San is an acidic sanitiser from the makers of PBW and was developed especially for sanitising brewing equipment. Only 30 seconds of contact time is needed and does not require rinsing.
- Unlike other no-rinse sanitisers, Star San will not contribute off-flavours even if used in higher than recommended concentrations.
- The recommended usage of Star San is one fluid ounce per five gallons of water.
- Alternatively, the solution can be put in a spray bottle and used as a spray-on sanitiser for glassware or other items that are required immediately.
- The foam from the spray is as effective as immersing equipment in a solution.
- The surfactant used by Star San will not affect the head retention of a beer like those used in other detergents.
- Star San is a preferred sanitiser for all usages except for those than can conveniently be done in a dishwasher.
- A solution of Star San has a wonderful long usage life. An open bucket of Star San will remain active for several days.
- A solution of Star San kept a closed container will increase its shelf life.
- The solution's viability can be monitored by its clarity; as it becomes cloudy, the viability reduces.
One last note on this product:
It is listed as a sanitiser and bactericide by the FDA and EPA. Therefore the container must list disposal warnings suitable for pesticides.
Do not be worried. It is less harmful to your skin than bleach.
3. STERILISATION AND DISINFECTION OF HOME BREW EQUIPMENT
Heat is one of the few ways the home brewer can sterilise an item.
Why would you need to sterilise an item?
Homebrewers who grow and maintain their own yeast cultures want to sterilise their growth media to ensure against contamination.
It is killed when a microorganism is heated at a high enough temperature for a long enough time.
A brewer can use dry heat (oven) and steam (autoclave, pressure cooker or dishwasher) for sanitising and sterilising.
Oven
Although dry heat is not as effective as steam for sanitising and sterilising, many brewers use it.
The best place to do dry heat sterilisation is in your oven. To sterilise an item, refer to the following list for temperatures and times required.
Dry Heat Sterilisation
Temperature Duration
338°F (170°C) 60 minutes
320°F (160°C) 120 minutes
302°F (150°C) 150 minutes
284°F (140°C) 180 minutes
250°F (121°C) 12 hours (Overnight)
- The times indicated begin when the oven has reached the required temperature.
- The durations seem long, but remember, this process kills all microorganisms, not just most, as in sanitising.
- To be sterilised, equipment needs to be heat-proof at the required temperatures.
- Metal and glass items are prime candidates for heat sterilisation.
- Some home brewers bake their bottles using this method and thus always have a supply of clean, sterile bottles.
- The bottle's opening can be covered with aluminium foil before heating to prevent contamination after cooling and storage.
- Bottles will remain sterile indefinitely if kept covered.
- A note of caution: bottles made of soda lime glass are much more susceptible to thermal shock and breakage than bottles made of borosilicate glass, and they should be heated and cooled slowly (e.g. five °F per minute).
- You may assume all beer bottles are made of soda lime glass and that any glassware that stipulates Kimax or Pyrex is made of borosilicate.
Dishwashers, Pressure Cookers, Autoclaves.
- When we talk about using steam, we refer to using an autoclave or pressure cooker.
- These devices use steam under pressure to sterilise equipment.
- As steam conducts heat more efficiently, the cycle time for such devices is much shorter than when using dry heat.
- The typical time to sterilise an item of equipment in a pressure cooker or an autoclave is twenty minutes at 257° F (125 °C) at 20 pounds per square inch (psi).
Dishwashers can be used to sanitise, as opposed to sterilising, most of your brewing equipment. 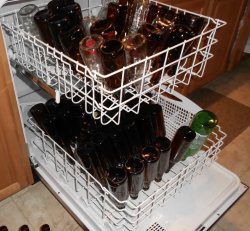
Take care with plastic items so that they are not subject to warping.
The steam from the drying cycle in the dishwasher will sanitise all surfaces.
Bottles and any other equipment with narrow openings should be pre-cleaned. Run the equipment through the entire wash cycle but do not use any detergent or rinse agent.
Dishwasher Rinse Agents left on your glassware will destroy the head retention on your beer. If you pour a glass of beer with carbonation and no head, this might be the cause.
Cleaning and Sanitising Bottles
Dishwashers are ideal for cleaning the outside of bottles and heat sanitising but will not effectively clean the insides of the bottles.
If your bottles are dirty or mouldy, soaking them in a mild bleach solution or sodium percarbonate type cleaners (ex. PBW) for 24 to 48 hours will help. Soaking will soften the residue. However, you'll still need to scrub them thoroughly with a bottle brush to remove any stuck residue.
To make bottle cleaning more effortless in the future, rinse them thoroughly after each use.
4. DISINFECTION AND STERILISATION SUMMARY LIST
1. Detergents (squirt)
Using unscented detergents that won't leave any odours behind is vital.
Be sure to rinse well.
2. PBW
One-quarter cup per 5 gallons (<1 Tbs per gallon)
PBW is the best all-purpose cleaner for the soil on all brewing equipment.
Most effective in warm water.
3. Sodium Percarbonate
One tablespoon per gallon.
Sodium Percarbonate is an effective cleaner for soiled brewing deposits.
It will not harm metals.
4. Bleach
1 - 4 tablespoons per gallon.
Good cleaner for soiled brewing deposits.
Do not allow the bleach to contact metals for more than an hour.
Corrosion may occur.
5. TSP, CTSP
1 tablespoon per gallon.
Good cleaner for soiled brewing deposits.
It may often be found in paint and hardware stores.
Prolonged exposure times may cause mineral deposits.
6. Dishwasher
The typical amount of automatic dishwater detergent
It is recommended for metal utensils and glassware.
Brewers should not use scented detergents or those with rinse agents.
7. Oven Cleaner
Follow product instructions.
Oven Cleaner is often the only way to dissolve burned-on sugar off equipment.
8. White Distilled Vinegar
Full Strength as necessary. Most effective when hot.
Helpful to clean copper wort chillers.
Cleaners made for Stainless Steel, and Copper pots and pans are also beneficial.
9. Vinegar and Hydrogen Peroxide
used in a ratio of 2:1 volume of vinegar to peroxide
Helpful in removing surface lead and cleaning brass.
10. Oxalic Acid-based Cleansers
As Needed when scrubbing
Use for removing stains and oxides.
Sanitisers
1. Star San 2 tablespoons per 5 gallons
Star San can be used via immersion or spraying.
Will sanitise clean surfaces in 30 seconds.
Allow to drain before use; it does not need to be rinsed.
2. Iodophor 12.5 - 25 ppm 1 tablespoon per 5 gallons = 12.5 ppm.
Iodophor will sanitise in 10 minutes at 12.5 ppm and does not need to be rinsed.
Allow draining before use.
3. Bleach: 1 tablespoon per gallon.
Bleach will sanitise items in twenty minutes.
It doesn't need to be rinsed but probably should prevent chlorophenol flavours.
4. Dishwasher: Full wash and Heat Dry cycle without any detergent.
The inside of any bottles must be clean before being put in the dishwasher for sanitising.
Place all bottles upside down on the rack.
5. Oven 340°F for 1 hour
Renders' bottles sanitised but not sterile.
Give the bottles time to cool slowly to prevent thermal shock and cracking.
Clean all brewing equipment as soon after use as possible.
Cleaning means rinsing out the fermentor, tubing, etc., as soon as these items have been used.
During a brew day, it is easy to become distracted and come back later to find that the yeast or syrup has dried rock hard and your equipment is stained.
If time is pressing, keep a large container of water handy and toss things in to soak until you can clean them later.
You can use different cleaning and sanitising methods for various equipment types.
It would be best if you decided which methods work best for you in your brewery.
Good preparation will make each brewing process more straightforward and successful.
One of the most critical steps in winemaking or beer making is sanitising and sterilisation.
Failing to do these steps properly or eliminating them can ruin your drink.
Every piece of equipment that comes in contact with the concentrate or finished wine/beer must go through these processes. Sanitising should be done just before every step.
To Sanitise, use a solution of VWP or metabisulphite to clean all the equipment. Not all dirt is visible, so clean equipment must be sanitised. After sanitising your equipment, rinse thoroughly with hot water.
Sterilising is not just to clean the equipment but also to kill bacteria on clean utensils. You can use metabisulphite to create a non-rinse steriliser. Use home brew sterilising solution of10g of metabisulphite per litre. Spray this on the equipment before use.
Note: Plastic equipment such as fermenters/buckets, plastic carboys and spoons should be discarded and replaced as they age.
If the inside of the pail is scratched or the plastic is severely discoloured, it may be time to change it. When these symptoms appear, cleaning or sterilising is usually not enough.
If you store your carboys corked with a little metabisulphite solution, they'll be ready next time you need them. Just swirl to coat the inside, rinse, and you're ready to go.
Clean and sterilise the lid of your primary fermenter first. Then you can place it upside down on a clean surface and put your smaller items on it (floating thermometer, stirring spoon, hydrometer) until ready to use.
Filtering equipment should be cleaned and sterilised before use and between each batch as you filter, as any yeast cells attached to the plates will transfer to the next instalment.
Clean your glass carboys with warm water and VWP sterilising solution. Do not use hot water; this can cause the carboy to BREAK.
When sterilising, get a trigger spray bottle and fill it with your stock solution of sulphite. When it is time to sanitise, you can quickly spray the inside and outside of the fermenter, racking tubes, syphon hose, spoons e.t.c., varying the spray to liberally coat large surfaces or directing a straight stream down your racking tube. If you have a one-litre spray bottle, you can mix your sulphite solution directly in the sprayer, using two level teaspoons of sulphite to one litre of water.
In beer production, nothing is more important than sanitation. Commercial breweries and wineries put a lot of their resources and time into it. Furthermore, poor hygiene causes the majority of home brewing problems. Be liberal with your sanitising solution. When in doubt, scrub it, soak it and sanitise it.
Check out all brew Mart's home brew hints & tips